Before building the dropController it may be a good idea to check and setup the Bluetooth module. Either a HC-05 or HC-06 can be used but the HC-06 is easier to use. The HC-06 is a slave only device and the HC-05 is master or slave.
For this guide I am using a Waven/HC HC-06 module (these are the official HC modules) on a zs-040 breakout board. Note: Although the module can accept 3.6V to 6V power in the TX and RX pins are 3.3V (not 5V).
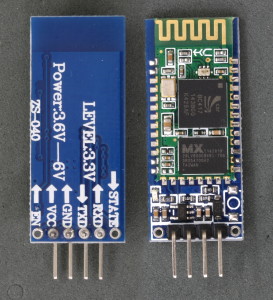 Official HC HC-06s have the HC logo just under the antenna and the newer boards have a blue LED at the top left.
There are many similar modules that look the same but can have different firmwares. For the most part all are the same when used with the dropController.
Circuit
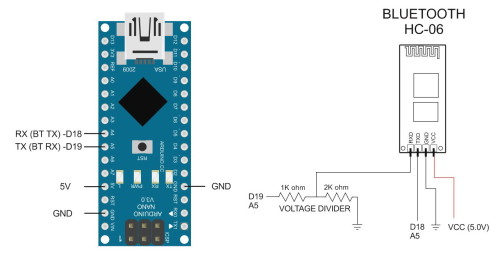
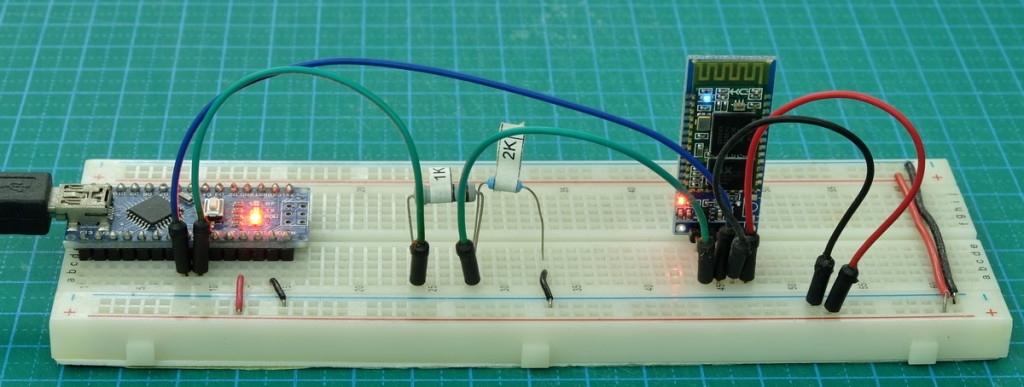
First build a basic circuit connecting the HC-06 to the Arduino. The two main connections are:
– Arduino RX/D18 to HC-06 TX
– Arduino TX/D19 to HC-06 RX via a voltage divider
– GND to GND
The HC-06 RX pin is 3.3v. The Arduino TX pin is 5V. The voltage divider brings the Arduinos 5V down to 3.3V.
The Arduino sees 3.3V as HIGH so we can connect the HC-06 TX pin directly to the Arduino RX pin.
You can setup the Bluetooth module using a finished dropController. Just upload the serial pass through sketch and follow the below.
The first thing to do is to power on the Bluetooth module and see if you can connect to it. For this you need an Android device.
With the Bluetooth module powered and the LED(s) blinking, on the Android device go to Settings => Connections => Bluetooth and scan for Bluetooth devices.
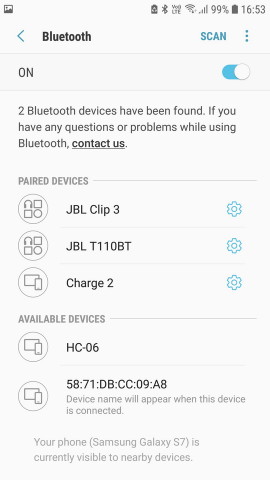
Here the phone has found the HC-06. You may have a different name including ? or ???? if you bought your module from China.
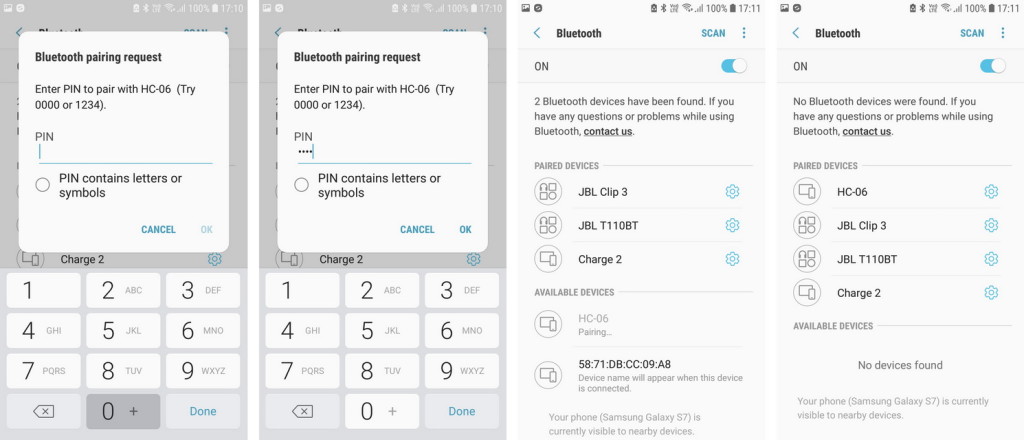
Tap the HC-06 label, you should be asked for the PIN, this is Normally 1234 so enter 1234 and click OK.
Pairing with the HC-06 confirms it is working and that we can communicate with it.
Serial pass through sketch
Next we can try to talk to the module, for this we use a serial pass through sketch. The following assumes the module has a default baud rate of 9600. This is the speed almost all HC-06 have when you first purchase them.
char c;

#include
SoftwareSerial BTserial(18, 19); // RX, TX
//D18 is A4
//D19 is A5

void setup()
{
     Serial.begin(9600);
     Serial.println("Serial started at 9600");

     BTserial.begin(9600);
     Serial.println("BTserial started at 9600");
}

void loop()
{

    if (Serial.available() > 0)
    {
       c = Serial.read();
       BTserial.write(c);
    }


    if (BTserial.available() > 0)
    {
       c = BTserial.read();
       Serial.write(c);
    }
}
This is a fairly simple sketch. It opens the hardware serial and a software serial at 9600 bps. It then waits for serial data. When there is input from the Hardware serial (via the serial monitor) it is sent to the Bluetooth module and when there is data from the Bluetooth module it is sent to the serial monitor.
Talking to the Bluetooth Module
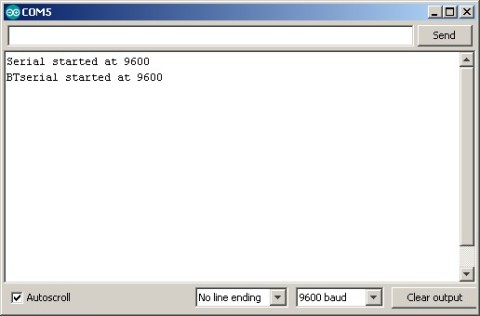
Upload the sketch and open the serial monitor. Set the baud rate to 9600 and line endings to “No line ending”. You should see the welcome message.
The HC-06 should be on and the LED(s) blinking.
In the serial monitor enter “AT” and click send. You should get an “OK” in reply.

If you do not get the OK, check the connections. If this does not work try adding line endings.
Note. Most Hc-06s require “No line ending” but not all. If you do not get an joy talking the the HC-06 try change the line endings.
If this does not work have a look at www.martyncurrey.com. I have various guides on different Bluetooth modules there.
If you did get the OK the next step is to rename the module. This is done with the the “AT+NAMEname” command.
In the serial monitor enter AT+NAMEdropController and click send.

You should get a “OKsetname” reply. This means the rename was successful.
Wait a few seconds and cycle the power on the HC-06. Back on the Android device search for Bluetooth devices and you should see a new entry called dropController. Depending on your actual Android device and the version of Android running you may need to pair with the Bluetooth module again.
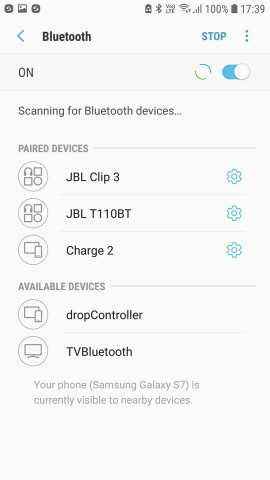
Done. You have confirmed the Bluetooth module is working and renamed it to dropController.
